Pages

Centers Your Students Can Complete Independently


Raise your hand if you're like me and you love centers! I love using centers as much as possible. They give students a chance to work collaboratively with one another and give me the opportunity to get some guided reading done and check IEP goals. One of the biggest problems I have had with centers in the past is students not knowing what they should be doing and not understanding the concept. Ahhh!  For example, I've prepared some great word sorts for students but then checked their work and found that they didn't get any answers correct and had no idea what they were doing during the entire center time. Double Ahhh! Well, I think I found my solution, and it is through the use of QR Codes. You can use QR Codes to give students frequent feedback to let them know whether or not they are on the right track in their learning.

If you're not familiar with using QR Codes in your classroom, check out my previous blog post first by clicking here!

QR Codes can be used for all different subject areas and can be differentiated to meet the needs of all levels of your learners. Here are some of my favorites! Click the picture to be taken to the resource...and yes there is one freebie included! ;)


Here are some QR Codes being used during math. Students use a dry erase marker to practice using a number line. After they have answered the question, they scan the code and the correct answer will appear. Quick feedback lets students monitor their understanding!


Both of the QR Code task cards above focus on decoding. One on CVC words and the other on vowel teams! Once students read the word they can scan to be taken to a picture of the word. Love the differentiation!!


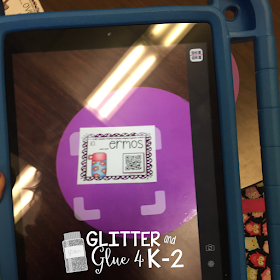
Even phonemic awareness skills can be used with QR Codes. Above is one of my favorites, Rhyme Around the Room! The use of technology, foundational reading skills, and moving around the room? Oh yes! Just make sure you have a heavy duty iPad case! ;)


Contraction fun! This version comes with an optional answer key.


Reinforcing digraphs with QR Codes. Get this one free at my TPT shop by clicking the picture above!


So what do you think? Do you use QR Codes? How do you use them? I would love to hear about it in the comments!


Want to come back to this post? Pin this image?

Writing Detailed Lesson Plans (That Won't Take All Night)


Hi friends! I've have had a love-hate relationship with writing lesson plans in the past. I love them because the more detailed they are, the more prepared I feel! I also am less anxious if I have to miss a day unexpectedly because a substitute can grab my plans and teach. However, I am less thrilled about the time they take to write. I've changed up the way and programs I've used to write lesson plans more times than I count! Since I've finally found a program that has really worked for me, I thought I would share it with all of you! It's called Planbook and it's an online program that allows you to input your schedule, include attachments, and write lesson plans. This is in no way a sponsored post. I just love Planbook and wanted to tell you all about it! If you haven't heard of Planbook you can go to the site by clicking here! Even if you don't decide to use Planbook, you will still find some great tips and tricks on writing detailed plans that will make your week run more smoothly!

When I first started teaching, I was writing detailed lesson plans that were seriously taking me hours and hours! Luckily one of my amazing co-teachers, Melissa, was using Planbook and suggested I use it too since we would be co-teaching together. Planbook is a great tool if you are co-teaching because you can easily share your plans with one another and access the other's plans.

When I write my plans I like to write them so that a substitute can pick up my plans and know exactly what to teach. To do this, you can include an explanation of your classroom procedures and where to find things you use on a daily basis. For example, during my intervention groups we alway start out with a review. Since I know we will be following this procedure each day, I made sure to type up a very detailed explanation of how to run the review. I include what I say, how the students are expected to respond, and where I keep the materials needed. When you have this information added to Planbook there is the option where you can "extend" the lesson. Once I have this information added in to my plans, I can click "extend" and select the amount of days I want this information to be included in my plans for. So much easier than copying and pasting or retyping information!

Include detailed information on common procedures through your lesson plans.

Another feature Planbook has that I love is the ability to include attachments for each lesson. I love using SmartBoard lessons and anchor charts, so having the option to attach a Smartboard or picture of an anchor chart is great! So many times I have had a Smartboard lessons ready to go but have not been able to find it on my desktop. With Planbook,  a substitute or I can just click right on that day's plan and be ready to go! Another great part about Planbook is that if you have a video or online game, you can easily copy and paste it.

Including attachments

Well I hope this helped! Again, you don't need to use Planbook to do all of these things but it is by far the best program I have found for writing lesson plans. No one likes to unexpectedly miss a day but I hope that if you do, some of these tips can make your substitutes and your day a little better! Do you use Planbook or an online program to write your lesson plans with?


Want to come back to this post? Pin the image below!


Spaghetti and Meatball Spacing for Writing

So... I love food and I love teaching! If you can combine the two then I am a very happy teacher. If you're like me, I thought you might enjoy reading about my favorite food themed lesson! This is something I've seen around Pinterest and in lots of classrooms! It's a great way to teach spacing to your little learners!


Giving your kiddos clear visuals and referencing things they are familiar with is a great way to help students learn. Not only are lessons with themes tons of fun for your little ones, but they help students to make connections!  When students can make connections, it makes their learning meaningful and much more memorable.

Click the picture to get this anchor chart!

When I start the lesson, I show students the anchor chart above. I tell students when they write, little spaces go between their letters, like spaghetti noodles. Larger spaces, like meatballs, go between words. I even let students come up to the anchor chart to glue uncooked noodles or pieces of yellow yarn between the letters in the sentences at the bottom.


Practicing our spacing on the SmartBoard
After students understand the concept, I show them an example of spacing on the SmartBoard. Then I add in the "spaghetti and meatballs." I let students come up and do the same!

Click here to get this!
After we've practiced together, I give my students some independent practice! They get their own spaghetti and meatball writing paper, seen above. Students also get a separate paper with meatballs printed on it. They cut out and glue those meatballs between their words as they write. Then, they can draw in their spaghetti spaces between their letters with a yellow marker. 


Well I hope you got some new ideas for teaching spacing to your students! If you would like to purchase the writing paper and printables to make your own anchor chart, you can purchase it at my TPT by shop by clicking here!


Teaching Main Idea to Elementary Students


Main idea can be a tricky skill to teach, especially to young learners! Although it is a difficult concept to master, it is a crucial skill your students need to comprehend what they read. Before you begin teaching main idea in reading passages, help your students to master this skill with images and real items. My favorite way is with a mystery!


It's helpful to have students think of main idea like a puzzle, all of the details come together to make "the big picture." I tell my students that putting together details to solve puzzles is like solving a mystery. They love the idea of getting to be detectives!


To teach main idea, I use "Main Idea Mystery Bags." In each bag, I include 5 different pictures that are all related. Students will take out each picture or "clue" to see what they have in common. For example, in the mystery above, I have included pictures of socks, a coat, a sweater, a hat, and a shirt. The main idea of this would be clothes. You can find pictures of the items you want to use or include real items.


I give my students magnifying glasses in case they need to take a "closer look" at our clues! It's a small detail but they love it! Once students have looked at their clues and they know what the main idea is, they can write it on the recording sheet.


In the mystery above, the bag is labeled as "Main Idea Mystery #1." Students will write the main idea next to the appropriate number. Students will do this with each mystery.


Finally, when students are finished, they can check their answers. I put my answer key in a small envelope, like the one above. To keep with the mystery theme, I added "top secret" and "confidential" to it. I found the words by doing a simple Google search. 

Checking answers in the "top secret" envelope.

There you have it! Fun, engaging, and a concrete way to teach main idea to your little ones! Want more fun and less prep? You can get the main idea mystery bags seen above along with bags that includes sentences by clicking here or on the picture below!


Ready for your freebie? You can get a one of the recording sheets from my main idea mystery bags by clicking here! Use these with your own mystery bags to check students understand!

If you have used main idea mystery bags, what have you put in yours? What are somethings you would put in yours? Leave me a comment below!!


Happy Teaching!,


How To Use QR Codes in the Classroom


Hi teacher friend! Do you love using centers in your classroom? Are you looking for new ways to integrate technology in your centers?  Have you ever wanted to use QR Codes in your classroom but you're just not sure where to begin? If you answered "YES!"  to my questions then this blog post is for you!  I am going to show you my favorite QR Code app, how to scan a QR Code, and some of my favorite free and paid resources for QR Codes!

First, you might be wondering, "What is a QR Code?!" A QR Code is a readable barcode that can be scanned with a device. Once it is scanned, it will take the user to another source of information. They are great to use in the classroom because they are easy to scan and take the user right to the information they need. They are perfect if you want your students to be able to check their work!

These task cards have QR Codes!

To get started, you will need a device. At my school, I have one iPad for my students.  They share this device during center time. If you don't have an iPad, you can use an old iPhone that you've updated or an iPod Touch. If you don't have any devices I would recommend checking Amazon. You can also ask family, friends, or parents to donate their old devices!

Once you have your device, you will need to download an app from the App Store that will read QR Codes. My favorite app for this is called"QR Reader." Guess what? It's totally free at the App Store! Yay for free stuff!! To get it, just go the App Store, type in "QR Reader", and download.

Here is how it will look once it has downloaded.

Now that you've downloaded the app, you can start searching for QR Code resources! There are so many options! You can find QR Codes that will take students to online books, videos, and so much more. My favorite way to use QR Codes is during centers. If you want to give QR Codes a try before you make a purchase, you can go to my TPT shop and get a freebie here!

Feel ready to start purchasing some other resources for math or reading? Get some of my favorite QR Code resources here!

Give QR Codes a try with this freebie from my shop!

Once your app has been installed and you have some QR Codes, you can start scanning! I've included photos and a video below to show you how to scan a QR Code.

First tap the QR Reader to open it.

Once you've opened the app, a screen like this will appear. It will look like a camera. 

Line up the QR Code in the square. It will usually scan very easily. If it does not, you can tap the screen on the QR Code or hold the device closer or farther from the QR Code.

Once the QR Code scans, it will take you to another screen. In this example it has taken me to the correct answer in a separate Dropbox file. Once are are finished, you can tap the "X" in the upper left hand corner and it will take you back to the camera.
Are these pictures still not helping you learn how to scan? Check out this quick video below that will show you how to scan too!


I hope this was helpful!! How do you plan to use QR Codes in your classroom? I would love to hear from you in the comments!


Pencil Management


Have you ever felt completely frustrated by pencils? Whether it's students not having a sharp pencil or even having a pencil altogether, this process can take away from your valuable instructional time! It's crazy how something so small can cause such a BIG problem! Not to mention, it can be a chore to organize your pencils. When I first started teaching I put my extra pencils for students to use in cups. I had one cup for sharp pencils and one for dull pencils. Sadly this system did not work. The cups were CONSTANTLY getting tipped over and my pencils were never put back in the correct cups (AHHHH!) Well friends, I've found a solution that works for my classroom! I'm going to share some tips with you that has helped to save some of my sanity....


I now store my pencils in drawers! Each drawer is labeled with either sharp, dull, or erasers with an accompanying picture. You may choose for students to start out with 1-3 pencils at the beginning of the day. When they are in need of a pencil, they can go to the drawers and take one from the "sharp" drawer. If their pencil is broken or needs to be sharpened, they will put it in the "dull" drawer. They are also responsible for grabbing an eraser if needed. When we are running low on sharp pencils I typically sharpen them. You can also choose to make this a student's job. The large and bold print with the visual has been extremely helpful for students to know where to put their pencil! They almost always get put in the correct place!

Pencil Drawers
Get the drawer labels from my TPT shop by clicking here! Best of all, you can edit the text if needed! :) *The label shown above are 1.75 inches tall by 6.08 inches wide. Click the link or image below to grab similar drawers that will fit the labels. STERILITE 3 Drawer Mini  

Click the image to grab drawers similar to mine!

Right now I keep these drawers in my writing center because I don't have a very large space. I would suggest keeping yours drawers wherever works best for you! If you are interested in how I organize my writing center check out my previous post here!

So now that you've got your pencil management figured out you can take a minute to kick back and relax. Pencil shoes not required....


 Glitter and Glue 4 K-2 is a participant in the Amazon Services LLC Associates Program, an affiliate advertising program designed to provide a means for sites to earn advertising fees by advertising and linking to amazon.com

*
*
*
Want to come back to this post? Pin the image below!

How to Enlarge Posters


How to Enlarge Posters
Hello friends! Have you ever had classroom posters that you would like to make bigger? I have! Luckily one of my sweet colleagues, Melissa from Melissa's Lil Learners, showed me how to enlarge my favorite posters and I couldn't believe how easy it was!

First, you're going to need Adobe Reader. Don't have Adobe Reader? No problem! You can get it free here.

Step 1: Open up your posters in Adobe Reader. Select file and then print.


Step 2: After you have gone to the print screen, under page sizing and handling select Poster. Below the poster selection, check the box that says Cut marks. This will show you how your poster will be divided among the pages it prints on and where you will need to cut it out. 


Step 3: Under Tile Scale, type in the percentage that you would like your posters to be enlarged to. I typically do 150% which makes my posters 11.5 inches wide by 15 inches tall. You can play with the percentage here! 

Step 4: Print your posters! It will come out in several different pieces like in the picture below. Cut out the pieces and glue them together. I typically leave some of the white space so I can easily glue it together.


Step 5: Laminate your posters so they will stay looking nice all year! 

Ta-Da! There you have it! I hope this little tutorial was helpful! If you're looking for the same poster seen in the pictures you can get it here with more inspirational posters!

Check out these posters! They come in SO MANY themes to fit your classroom!

Happy teaching,


*********************************

Want to come back to this post later? Pin the image below!